
In this article we will discuss about annotations and how they can be used in practical programming. First, we will discuss some conceptual ideas and then jump into coding to write an example program using annotations.
Motivation:
In Java programming, there are several methods to declare the behavior of different elements (like methods, classes, members etc). In most of the cases these declarations are defined in some external files (XML, properties file etc). And then those files are referred in the program to get it executed.
In case of annotation, the approach is totally different. Annotations are meta-data and those are written in a specific format. These annotation elements are written within the Java program itself. So, there is no need to refer any external files, which is a big advantage. These annotations are easy to use and flexible enough to implement.
In the next section we will see how these can be implemented.
What is Java annotation?
A Java annotation is a metadata of a Java program. Или, simply speaking, a Java annotation provides information about a Java program. In most cases, it does not directly influence the program or code.
Why Java annotations are used?
A Java annotation can be used for the following purposes:
- Providing instructions to the compiler
When the compiler converts the code into machine-readable instructions, annotations can provide the compiler such instructions. обикновено, after compilation, the annotations are not present in the code.
- Providing instructions to the builder
These days, you would let tools like Apache Maven or Apache Ant to build the code. Annotations can be useful for build tools. When the build tools go about their tasks which include generating source code, generating XML files (например. deployment descriptors), packaging codes and files into a JAR file, it looks for the annotations for inputs on generating source code or files.
- Providing instructions to the software runtime
It is possible to define annotations for providing inputs to software runtime although such annotations can be accessed with Java Reflections, a different tool.
Annotations can be both predefined and custom. While custom annotations can be of many types, predefined annotations are of the following three types.
@Deprecated annotation indicates that a class, method or field that is no longer in use.
@ Override annotation indicates that a class in a method does not match any method in a superclass. In case of a mismatch, the compiler throws an error.
@SuppressWarnings annotation suppresses warnings thrown by the compiler. For example, if a method calls a deprecated method, the compiler throws a warning. The annotation suppresses such warnings and more.
Creating our first project:
In this section we will create a project by using Eclipse IDE. The code sample will show how annotation works in a real environment. Before moving into hands-on coding we need to complete the installation steps to make the environment ready.
Following are the installation details.
Step 1: Setting up Java development kit
Download JDK from the Oracle site, install and configure it. Then set the PATH and JAVA_HOME environment variables.
Step 2: Setting up Eclipse IDE
Изтегляне Eclipse от официален сайт. Инсталирайте го и настроите променливата на PATH.
Step 3: Изтегляне анотация пакети от пролет библиотеки.
В нашия пример, ние ще се използва Пролет анотация пакети. Download org.springframework.context.jar от горния линк и да го постави в ИЪ папка в Eclipse IDE, както е показано по-долу.

Пролетни пакети
Фигура 1: Анотация буркани в ИЪ папка
Сега нашата околна среда е готов да пишат Java програми с анотации.
Нека създадем първо проект чрез използване на Eclipse IDE.
Създаване на проект в Eclipse и определя името на пакета, както е com.techalpine.annotation. По силата на този пакет се създадат три Java класове, както е показано по-долу.
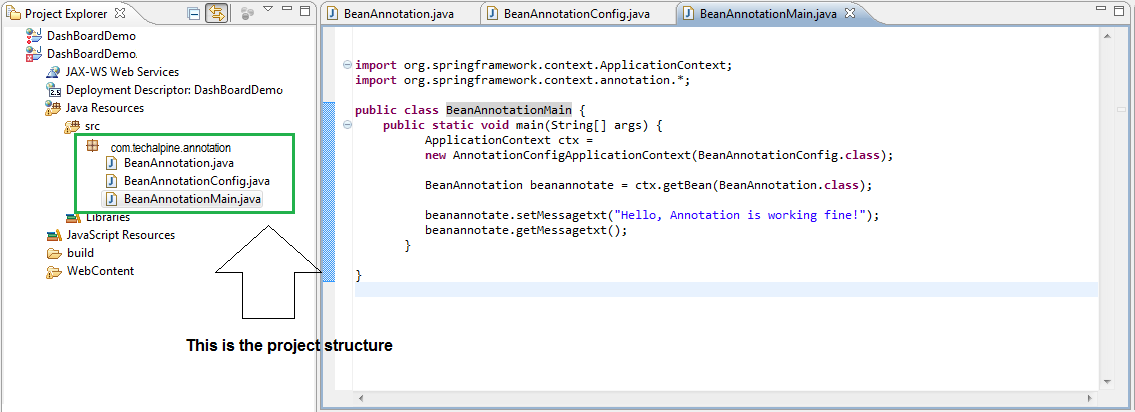
Структура на проекта
Figure2: структура на проекта
Три паралелки са BeanAnnotation.java, BeanAnnotationConfig.java и BeanAnnotationMain.java
Listing1: Това е класът на боб с газопоглъщащи и сетер методи
[код]
пакет com.techalpine.annotation;
обществени клас BeanAnnotation {
частни String messagetxt;
обществени невалидни setMessagetxt(String messagetxt){
this.messagetxt = messagetxt;
}
обществени невалидни getMessagetxt(){
System.out.println(“Това е съобщение : ” + messagetxt);
}
}
[/код]
След това е класът на конфигурация с @Configuration и @боб анотации. Тези пояснения ще идентифицират боб и информират контейнера за свързване.
Listing2: Това е класът на конфигурацията
[код]
пакет com.techalpine.annotation;
внасят org.springframework.context.annotation. *;
@Configuration
обществени клас BeanAnnotationConfig {
@Bean
общественото BeanAnnotation beanannotate(){
върнете нов BeanAnnotation();
}
}
[/код]
След това е главния клас за проверка на анотациите и как работи.
Listing3: Това е основният клас
[код]
пакет com.techalpine.annotation;
внос org.springframework.context.ApplicationContext;
внасят org.springframework.context.annotation. *;
обществени клас BeanAnnotationMain {
публично статично невалидни основни(Низ[] опцията) {
ApplicationContext CTX =
новият AnnotationConfigApplicationContext(BeanAnnotationConfig.class);
BeanAnnotation beanannotate = ctx.getBean(BeanAnnotation.class);
beanannotate.setMessagetxt(“Hello, Анотация работи добре!”);
beanannotate.getMessagetxt();
}
}
[/код]
Изпълнение на проекта:
The project structure is complete and it is ready to execute. Now run the application as shown below. It will be a stand-alone Java program, so it has to be run as a Java application as shown below.
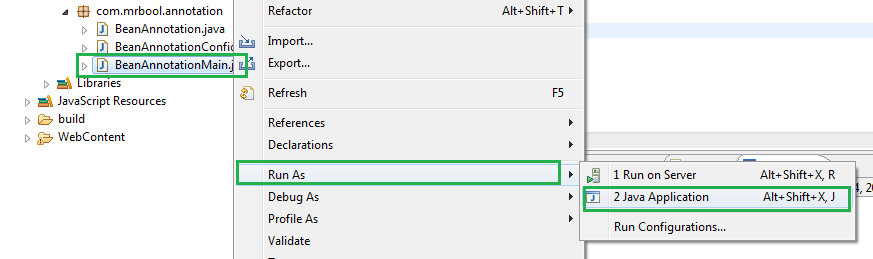
Run application
Figure3: Run the application
Once the main program is executed, it will show the following output.

продукция
Figure4: Showing output on the console
Заключение:
In this article we have discussed the concepts of annotation and how it can be implemented. Hope it will help the users to write Java programs with annotations.