Overview: Spring is one of the widely used frameworks in enterprise applications development. Spring has different components like Spring ORM, Spring JDBC etc to support different features. Spring for Apache Hadoop is the framework to support application building with Hadoop components like HDFS, MapReduce and Hive etc. Spring provides APIs to work with all these components. Spring also supports integration of Hadoop with other Spring ecosystem projects for real life application development. In this article we will discuss the usage of Spring for Apache Hadoop frameworks.
Introduction:
Apache Hadoop is an open source software framework, which is used to store and process data-sets of larger volume. Spring is also an open source framework, which is widely used in Java/J2ee applications. Spring’s dependency injection (DI) or inversion of control (IO) mechanism has become a popular alternative to the Enterprise Java Beans (or EJB) model. Spring has the advantage of being flexible enough to be easily plugged with any other development framework. Using this advantage of spring, we can plug it with Apache Hadoop to help us get the maximum benefit of each of these two frameworks.
Getting Started:
In this section we will talk about how to create a Hadoop MapReduce Job using Spring. This involves the following steps –
- Step 1 – Obtain the required dependencies using Maven – As we know maven is highly dependent on the pom.xml file, we make the following entries in our pom.xml file. These dependency entries are for Hadoop core and Spring framework.
Listing1: Sample configuration entries in pom.xml file
[code]
< !– Spring Data Apache Hadoop — >
< dependency >
< groupId > org.springframework.data </ groupId >
< artifactId > spring-data-hadoop </ artifactId >
< version > 1.0.0.RELEASE </ version >
< /dependency >
< !– Apache Hadoop Core –- >
< dependency >
< groupId > org.apache.hadoop </ groupId >
< artifactId > hadoop-core </ artifactId >
< version > 1.0.3 </version >
</dependency>
[/ code]
- Step 2 – Create the mapper component – As we know a mapper component is used to break the actual problem into smaller components. These smaller components then become easier to solve. We can have our own customized mapper component by extending the Apache map reduce Mapper class. We need to override the map method of this class. The mapper class expects the following four parameters –
For input: Following parameters are for input key and value
- KEYIN – This parameter describes the key type which is provided as an input to the mapper component.
- VALUEIN – This parameter describes the type of the value which is provided as an input to the mapper component.
For output: Following parameters are for output key and value
- KEYOUT – This parameter describes the type of the out put key parameter from the mapper component.
- VALUEOUT – This parameter describes the type of the output value from the mapper component.
Each of these parameters must implement the writable interface. In the given example, we have used our mapper to read the contents of a file one line at a time and prepare key-value pairs of every line. Our implementation of the map method performs the following tasks –
- First, split each single line into words
- Second, iterate through every single word and take out neither all the Unicode characters which are neither letters nor characters.
- Third, construct a key-value pair using the write method of the Context class which is compatible with the expected output key-value pair.
Listing2: Sample customized Mapper class
[Code]
public class MyWordMapper extends Mapper<LongWritable, Text, Text, IntWritable> {
private Text myword = new Text();
@Override
protected void map(LongWritable key, Text value, Context context) throws IOException, InterruptedException {
String line = value.toString();
StringTokenizer lineTokenz = new StringTokenizer(line);
while (lineTokenz.hasMoreTokens()) {
String cleaned_data = removeNonLettersNonNumbers(lineTokenz.nextToken());
myword.set(cleaned_data);
context.write(myword, new IntWritable(1));
}
}
/**
* Replace all Unicode characters that are neither numbers nor letters with an empty string.
* @param original, It is the original string
* @return a string object which contains only letters and numbers
*/
private String removeNonLettersNonNumbers (String original) {
return original.replaceAll(“[^\\p{L}\\p{N}]”, “”);
}
}
[/Code]
Step 3 – Create the Reducer Component – A reducer is a component which deletes the unwanted intermediate values and forwards only those key value pairs which are relevant. To have our customized reducer, our class should extend the Reducer class and over ride the reduce method. The reducer class expects the following four parameters.
For input: Following parameters are for input key and value
- KEYIN – This parameter describes the key type which is provided as an input to the mapper component.
- VALUEIN – This parameter describes the type of the value which is provided as an input to the mapper component.
For output: Following parameters are for output key and value
- KEYOUT – This parameter describes the type of the out put key parameter from the mapper component
- VALUEOUT – This parameter describes the type of the output value from the mapper component.
While implementing we must make sure that the datatype of the ‘keyin’ and ‘keyout’ parameters are same. Also the ‘valuein’ and valueout’ parameters should be of same type. Our implementation of the reduce method performs the following steps –
- First, check that the input key contains the desired word.
- Second, if the above step is true, get the number of occurrences of the word.
- Third, construct a new key-value pair by calling the write method of the reducer class.
Listing3: Sample customized Reducer class
[Code]
import org.apache.hadoop.io.IntWritable;
import org.apache.hadoop.io.Text;
import org.apache.hadoop.mapreduce.Reducer;
public class MyWordReducer extends Reducer<Text, IntWritable, Text, IntWritable> {
protected static final String MY_TARGET_TEXT = “Hadoop”;
@Override
protected void reduce(Text keyTxt, Iterable<IntWritable> values, Context context) throws IOException, InterruptedException {
if (containsTargetWord(keyTxt)) {
int wCount = 0;
for (IntWritable value: values) {
wCount += value.get();
}
context.write(key, new IntWritable(wCount));
}
}
private boolean containsTargetWord(Text keyTxt) {
return keyTxt.toString().equals(MY_TARGET_TEXT);
}
}
[/Code]
- Step 4 – Create the application context – Next step is to create the application context using XML. We can configure the application context of our application using the following steps –
- Create a properties file which contains the value of the configuration properties. A sample application properties file is shown below –
[Code]
fs.default.name=hdfs://localhost:9000
mapred.job.tracker=localhost:9001
input.path=/path/to/input/file/
output.path=/path/to/output/file
[/Code]
- Configure a property place holder which is used to fetch the values of configuration properties from the created properties file. This can be done by adding the following in our application context XML file –
[Code]
<context:property-placeholder location=”classpath:application.properties” />
[/Code]
- Configure Apache Hadoop and its job – We can configure the default file system and its job tracker by adding the following in our application context file
[Code]
<hdp:configuration>
fs.default.name=${fs.default.name}
mapred.job.tracker=${mapred.job.tracker}
</hdp:configuration>
[/Code]
We should add the following in our application context XML file to define the job tracker –
[Code]
<hdp:job id=”wordCountJobId”
input-path=”${input.path}”
output-path=”${output.path}”
jar-by-class=”net.qs.spring.data.apachehadoop.Main”
mapper=”net.qs.spring.data.apachehadoop.MyWordMapper”
reducer=”net.qs.spring.data.apachehadoop.MyWordReducer”/>
[/Code]
- Configure the job runner which runs the created hadoop job. The Job runner can be configured by adding the following in our application context XML file
[Code]
<hdp:job-runner id=”wordCountJobRunner” job-ref=”wordCountJobId” run-at-startup=”true”/>
[/Code]
- Step 5 – Loading the application context at startup – We can now execute the created Hadoop job by loading the application context when the application starts up. We can do this by creating the instance of the ClasspathXmlApplicationContext object which accepts the name of our application context file as input parameter to the constructor. This can be done as under –
Listing4: Sample showing loading of application context
[Code]
import org.springframework.context.ApplicationContext;
import org.springframework.context.support.ClassPathXmlApplicationContext;
public class Main {
public static void main(String[] arguments) {
ApplicationContext ctx = new ClassPathXmlApplicationContext(“applicationContext.xml”);
}
}
[/Code]
- Step 6 – Run the Mapreduce job – We can start our map reduce job using the following steps –
- Upload an input file into HDFS – We can do this by executing the following command on the command prompt –
[Code]
hadoop dfs -put sample.txt /input/sample.txt
[/Code]
Following is a sample input file which has been used in this example. The target key word ‘Hadoop’ is highlighted in GREEN. The word ‘Hadoop’ exists 4 times in the sample.
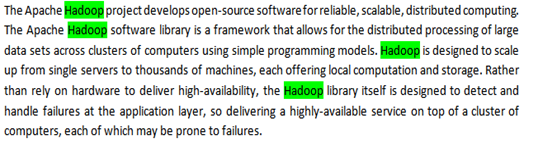
Input
Image1: Sample input file
- Check if the file has been uploaded successfully by running the following command. It will show the input file.
[code]
hadoop dfs -ls /input
[/code]
- Run the Mapreduce job. This can be done by executing the main method of our java file from the IDE. If all the steps work as expected then the following will be the output.
Output: Hadoop 4
Summary: Let us conclude what we have discussed so far in the following bullets –
- Both Spring and Hadoop are useful frameworks from the open source community.
- By combining these we can get the benefit of both the frameworks.
- Creating a map reduce job using spring is a six step process as explained above.