Overview: In this article we will discuss about the video animation creation using Adobe. Adobe Premiere Pro is one of the most popular software for multimedia Students, Designers, Animators, Web Developer for developing a video with standardized format and good effect. So this design is more and more popular among the developer community. Adobe Premiere Pro has a different version present in the market and the latest version is Adobe Premiere Pro CC7.0.1 which was released in July, 2013. It is based on Windows and Mac OS X.
Introduction: At first we have to know about Transitions. It is defined as the controlling, how the sequence moves from one clip to the next with proper process. If we do not use this Transition Effect to our movies then the effect does not match at our design. Here the sequence moves from the Out Point frame of one clip immediately to the In Point frame of the next clip as per system configuration. The Adobe Premiere Pro also provides several Transition Effects for making attractive movies. A cross fade transition is generating where the first clip converts less visible as the following clip suits more visible. There are also several types of effect present in Premiere Pro like Adjust effects, Blur and Sharpen effects, Channel effects, Color Correction effects, Distort effects, Generate effects, Image Control effects, Keying effects, Noise & Grain effects, Perspective effects, Stylize effects, Time effects, Transform effects, Transition effects, Utility effects, Video effects, Video dissolve transitions. Among this effect, Video effect is one of the popular effects.
Common properties for Video Transition Effects:
There are many Video Transition Effects. There are some common properties present. Those properties are given below. Property names are like ‘Duration’, ‘Alignment’ and ‘Start and End’. We have described the uses in the tabular format below. Hope this will help you understand the usage of the properties in a better way. In the following sections, the usage will be described. You can also try to use your own defined values for testing the properties. This will help you build your own application is a customized way.
|
Sl.No |
Properties Name |
Uses |
| 1 | Duration | It is specified in time code. The default Duration is 1 second. This default Transition can be changed in the Predilections settings. |
| 2 | Alignment | The alignment allows us to select the transition where it starts or ends. The transition can End at the Cut between clips. It is started at the Cut between Clips or be Centered at the Cut between clips. |
| 3 | Start and End | It is specified in percentage that shows the completion of the transition’s animation at the stating and end of the transition duration. The default percentage is starts from 0% and the ending part end with 100% |
Table1: Showing properties
Working procedure with Video Transition Effects:
The Transitions will work according to different process that depends on the number of trimmed frames after the Out Point of the first clip and the number of trimmed frames before the In Point of the second clip.
When we are dragging the clip from the Effects Panel to the Timeline Panel then we can align the clip interactively and the clip will spontaneous into place. The following image displays the process, how we can drag and drop our effect from effect panel to timeline panel.
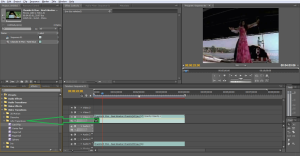
Image1: Showing effect panel
Here we set a video at our sequence panel and also at the time line. Normally this video is moved from one standard manner but if we want to give some attractive effect to this video then we have to click on transition effect which is laid on Effect Panel. After that click the effect panel and drag it to the original video and play it.
Through this way we can easily drag and drop different effect like 3D Motion, Dissolve, GPU Transition, Iris, Map, Page Peel, Slide, Special Effect, Stretch, Wipe, Zoom in our different video with proper knowledge. If we are not set this without proper knowledge then this effect is not attractive for us as well as others.
If both clips that have clipped frames at the cut then we can center this transition at the cut and also align the end of the transition at the cut or align the beginning of the transition at the cut as per requirements. If no clips have clipped frames at the cut then the transition will center at the cut. In that situation the last frame of the first clip will be repetitive for the second half of the transition interval and the first frame of the second clip will be repeated for the first half of the transition’s interval. The name of the transition will be appeared in the Timeline Panel with multiple diagonal lines through it. As it contains repeating frames, generally the first clip contains trimmed frames and the transition will automatically instant into the Start at Cut Alignment. When we find out that the second clip contains trimmed frames at the cut then the transition will automatically snap to the End at Cut Alignment efficiently.
Some time it is found out that many trimmed frames is not sufficient to cover the Duration of the Transition. Adobe Premiere Pro is software that automatically adjusts the Period value to match the number of available clipped frames. The system can be changed from Effect Controls Panel.
How to apply Transition:
At the time of placing a transition effect between two clips i.e. centered on the cut line then we see that the clips must be on the same track and it should not have a space between them. When we are dragging the transition in to the Timeline panel then we can adjust the set interactively. The clips have clipped frames governs the process for alignment the transition effect as we wish to place it in between the clips. If we are not set this transition effect then it will face a lot of trouble to manage the transition.
Some points should be remembered at the time of setting transition in the movie effect.
- At first we have to set clips containing clipped frames at the cut and we set center the transition over the cut or we can align it on either side of the cut so that it either starts or ends at the cut.
- Secondly it is neither clip contains clipped frames so this transition is automatically centers over the cut and as it repeats the last frame of the first clip and the first frame of the second clip to fill the transition period. We also find out that a diagonal bar will be appearing as duplicate frame.
- If this first clip contains a clipped frame and this transition is automatically cracked to the in point of the next clip points. The transition uses the first clip’s clipped frames for the transition. It is not repeated frames from the second clip.
- When the second clip contains clipped frames and the transition snaps to the Out point of the first clip. This transition uses the second clip’s clipped frames for the transition. It is not repeated frame which is coming from first clip.
- Generally the default time period of a transition as for audio or video is set to one second.
- If we find out that transition contains clipped frames and we also know that not enough to fill the transition duration.
- Adobe Premiere Pro is generally adjusts when the duration to match the frames.
- We can also adjust the time duration after the giving the transition effect to the frame.
Creating a slideshow with still images with standard Transition Effect:
- Got to the task bar and click the Add Media button.
- Navigate to the folder where you have stored your photos.
- Click on the folder to select it and click Add Folder.
- In the Media window, click the down arrow next to the Photos folder to expand it. Shift-click each photo to select them and click the Create Slideshow button at the bottom of the Media window
- From the Ordering menu, select Sort Order to place the images in the order they appear in the Media window.
- Change Image Duration to 2 Seconds and Transition Duration to 20 frames.
- After that click on OK button
The Create Slideshow command places the five still images at the end of the movie on the Video 1 track and adds the Cross Dissolve transition between each image.
Process to changing the default transition that is used for create slideshow command:
Generally Create Slideshow command optionally applies transitions between each clip it places. At the time of opening process the default transitions are Cross Dissolve for video or still images and continuous Power for audio. We can alter the default to any transition as per customer choice. At the time of changing the default transition that has no effect transitions already applied to a movie.
When we wish to change the default transition then we have to follow following points that are given below:
- Click the Effects button on the task bar. Adobe Premiere Elements displays the Effects workspace.
- In the Effects window, expand the Video Transitions or Audio Transitions folder.
- Expand the folder containing the transition you want to use, and select the transition that you want to make the default.
- Click the More buttons option and choose Set Selected as Default Transition. A red outline marks the icon of the default transition.
Procedure to Preview the slideshow effect from Premiere Pro:
- At first go to the current-time indicator to the beginning of the photos after that press on spacebar.
- The Pictures with transitions or effects can take longer to process for that reason the slideshow performance may not play as efficiently as the other clips like Flash, Director.
- Adobe Premiere Elements adds a thin and red line in the time ruler to designate that we should leading render that area for the best preview.
- Process is that Choose Timeline -> Render Work Area.
- When the process of rendering is completed then red line turns green and the Monitor window plays the movie.
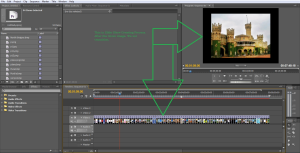
Image2: This image shows us how to slide show images are working and also looking.
Conclusion: Adobe premiere is no doubt most popular for their different features and also different parameter. At the time of animation editing, the tools which are required for generating standard and attractive video, we generally remember Adobe Premiere Pro Software. Lots of tools are used here for generating different video animation and transition.